How to Make an Escape Room on Google Forms
Creating an escape room with Google Forms is mostly a matter of splitting the game into sections and using answer checks to unlock each one. It’s a simple way to build a classroom activity, review game, or online challenge without needing special software.
The tricky part is making sure players cannot skip ahead or end up in the wrong section.
This guide walks through how to set up a digital escape room in Google Forms, how to lock sections with correct answers, and what to do if you need a more flexible form builder.
How to make an escape room on Google Forms
The core mechanic of a Google Forms escape room is simple: each section is a puzzle, and the question at the end of the section is the lock.
If you have never built one before, the easiest version is a linear escape room with 3 to 5 sections. That setup is much easier to test than a form with lots of branches, and it is enough for most classroom or team-building games. If you need something more elaborate, you may want to try using a alternative tool.
Here is how to put together a simple escape room on Google Forms step by step.
Step 1: Plan your story and puzzles
Before opening Google Forms, decide on the theme and structure of your virtual escape room.
- What is the main goal? The best escape rooms have a clear, compelling story that keeps players engaged. For example, escaping a locked laboratory or finding a hidden artifact.
- How many puzzles or stages will your game have? Each stage will represent a different section in your form. For each stage, you need a puzzle and a specific answer that acts as the key to the next stage.
- What the answer format will be for each puzzle? Decide whether the answers will be in the form of text, numbers, or a combination of both. This will help you determine which question types to use.
- Is the game linear or does it have branching paths? A linear game follows a single path, while a branching game offers multiple paths that players can choose from.
- How strict do you want the answer checking to be? You can be very strict, requiring exact matches with no room for error, or more lenient, accepting answers with slight variations.
Step 2: Create a new Google Form
Go to Google Forms and click the “Blank form” option to start a new project.
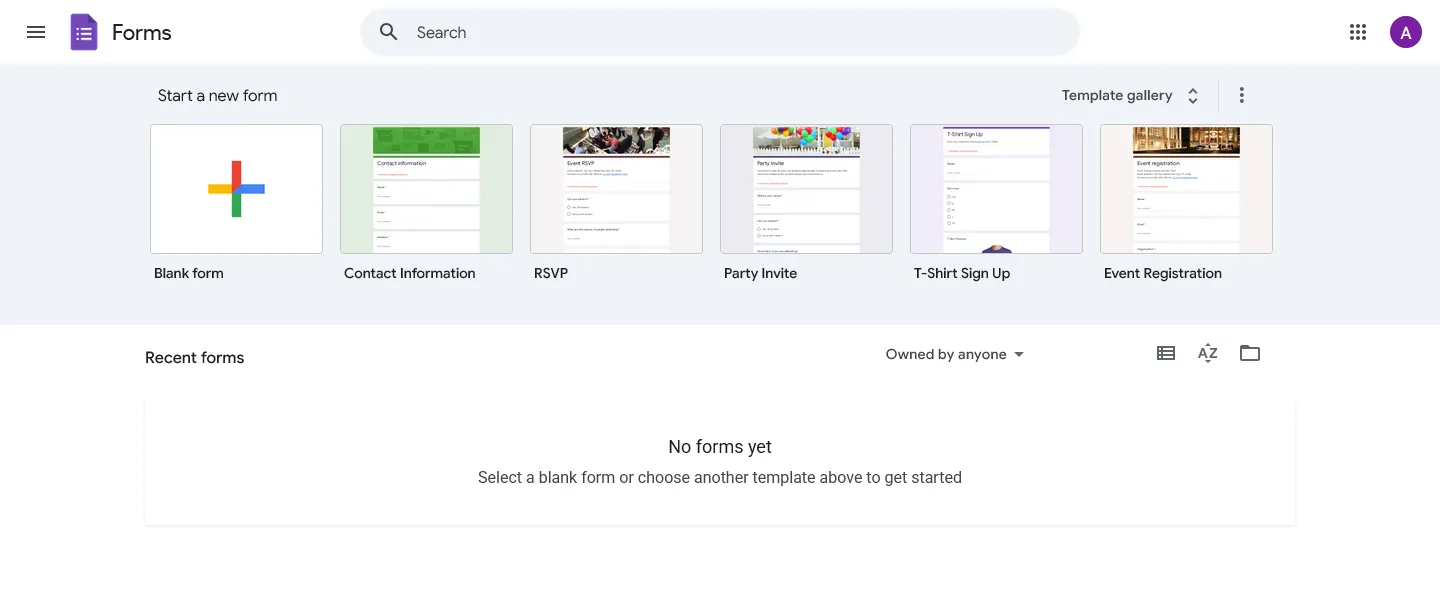
Give your form a clear title that reflects your theme. Add a short description below the title to set the scene. Tell participants what the rules are and what their ultimate goal is.
Step 3: Create the first puzzle
The first section of your form is where the game begins. You can add text, images, or even a video to provide clues.
Below your clues, add a question. This question is the lock for the room. The “Short answer” question type works best for passwords, number codes, and specific words. “Multiple choice” is useful if you want to give participants a few distinct options to choose from.

Step 4: Add response validation
This is the most important step. Response validation is the feature that stops participants from moving forward until they type the exact correct answer.
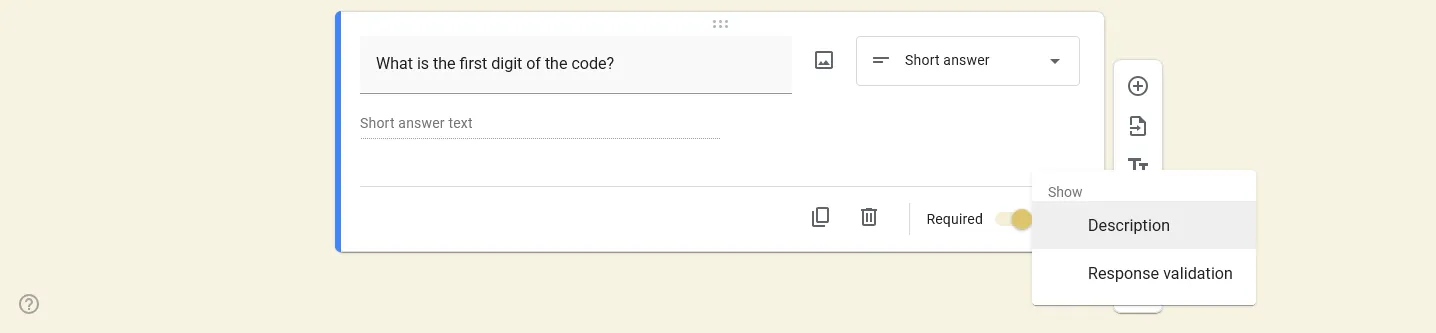
- Click on your Short answer question.
- Click the three-dot menu icon in the bottom right corner of the question box.
- Select Response validation.
- Choose the type of rule you need. If the answer is a code, select “Number” and “Equal to” or “Text” and “Contains”.
- Enter the exact correct answer in the value field.
- Type a custom error text. This is what participants see if they guess wrong. Something like “Incorrect code. Look closely at the map!” is much more helpful than a generic error message.

Finally, toggle the Required switch at the bottom of the question. This ensures no one can skip the question and move to the next room without solving the puzzle.
How to avoid answer validation problems
The most common problem in a Google Forms escape room is that the player has the right answer, but types it in a slightly different way than you expected.
To avoid that:
- Use number answers when possible
- Keep text answers short
- Tell players exactly what format to use, such as lowercase only or one word only
- Avoid answers with punctuation unless the punctuation is part of the puzzle
Step 5: Add a new section for the next room
To create the next stage of your escape room, click the Add section icon on the floating menu. It looks like two rectangles stacked on top of each other.
This creates a break in the form. When participants answer the question in the first room correctly and click “Next”, they will land in this new section.
Repeat the process from Step 3 and Step 4. Add your clues, create a question, set up response validation, and make the question required. Do this for as many rooms as you have planned.
Step 6: Create branching paths (optional)
If you want players to reach different rooms based on what they choose, you can create branching paths.
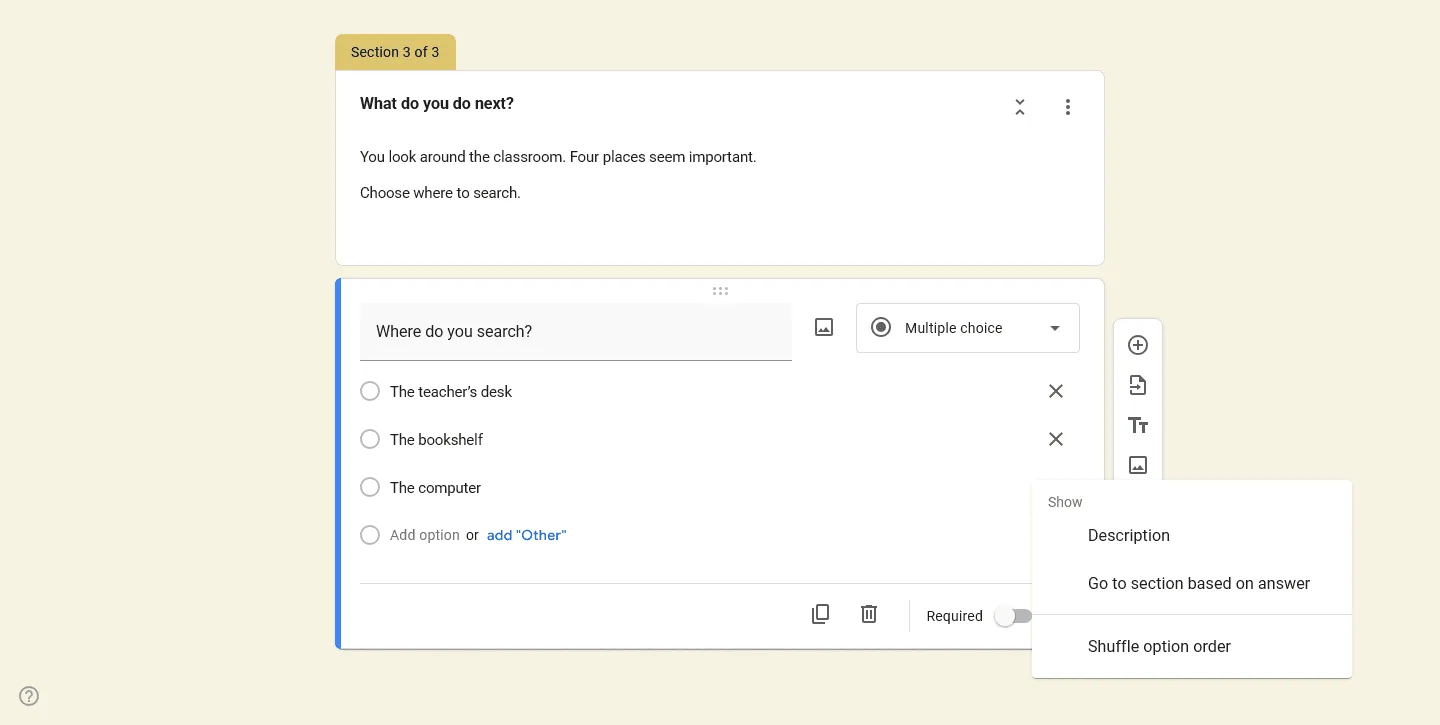
Add a multiple choice question and click the three-dot menu. Choose Go to section based on answer.
Assign each answer option to a different section. For example, if the question asks “Which door do you open?”, the “Red Door” option might send them to Section 3, while the “Blue Door” option sends them to Section 4. You can also send them backward to a previous section if they make a wrong choice.
Step 7: Finalize and test your escape room
Before you share the link with anyone, you need to play through the escape room yourself.
Click the preview icon at the top of the page. Read through your clues and try to enter both correct and incorrect answers. Check that your custom error messages appear when they should, and that the correct answers successfully unlock the next sections.
If you used branching logic, test every possible path to make sure no one gets stuck in a loop.
Once everything works, click the Send button to get your shareable link.
Limitations of making an escape room in Google Forms
Google Forms is free and accessible, making it a common choice for classroom activities and simple games. However, it does have a few drawbacks when it comes to building digital escape rooms.
If these limitations are a blocker, you may want to explore some Google Forms alternatives.
The design is very basic
Google Forms gives you very few options for visual customization. You can change the header image, the background color, and the font, but the overall layout always looks like a standard survey.
That is fine for a quick classroom game. It is less convincing if you want the room to feel like a mystery, a lab, a dungeon, or anything else with a clear atmosphere.
Response validation is strict
Response validation in Google Forms is case-sensitive and exact. If the answer is “apple” and a participant types “Apple ” with an accidental space at the end, they will be marked wrong. You can reduce that problem with clearer instructions, but you cannot remove it completely.
Branching paths get confusing to manage
If you build an escape room with many branching paths, the backend of your Google Form will become very difficult to manage. It is easy to accidentally send participants to the wrong section, and there is no visual map to help you track how the different rooms connect.
Other ways to make an escape room
Google Forms is fine for a simple escape room, especially if you want something quick and free. It gets harder to work with when you want a more visual setup, more flexible layouts, or branching that is easy to keep track of.
If you are looking for a way to build an escape room that feels less like a survey and more like an interactive experience, FormGrid can be a good alternative.
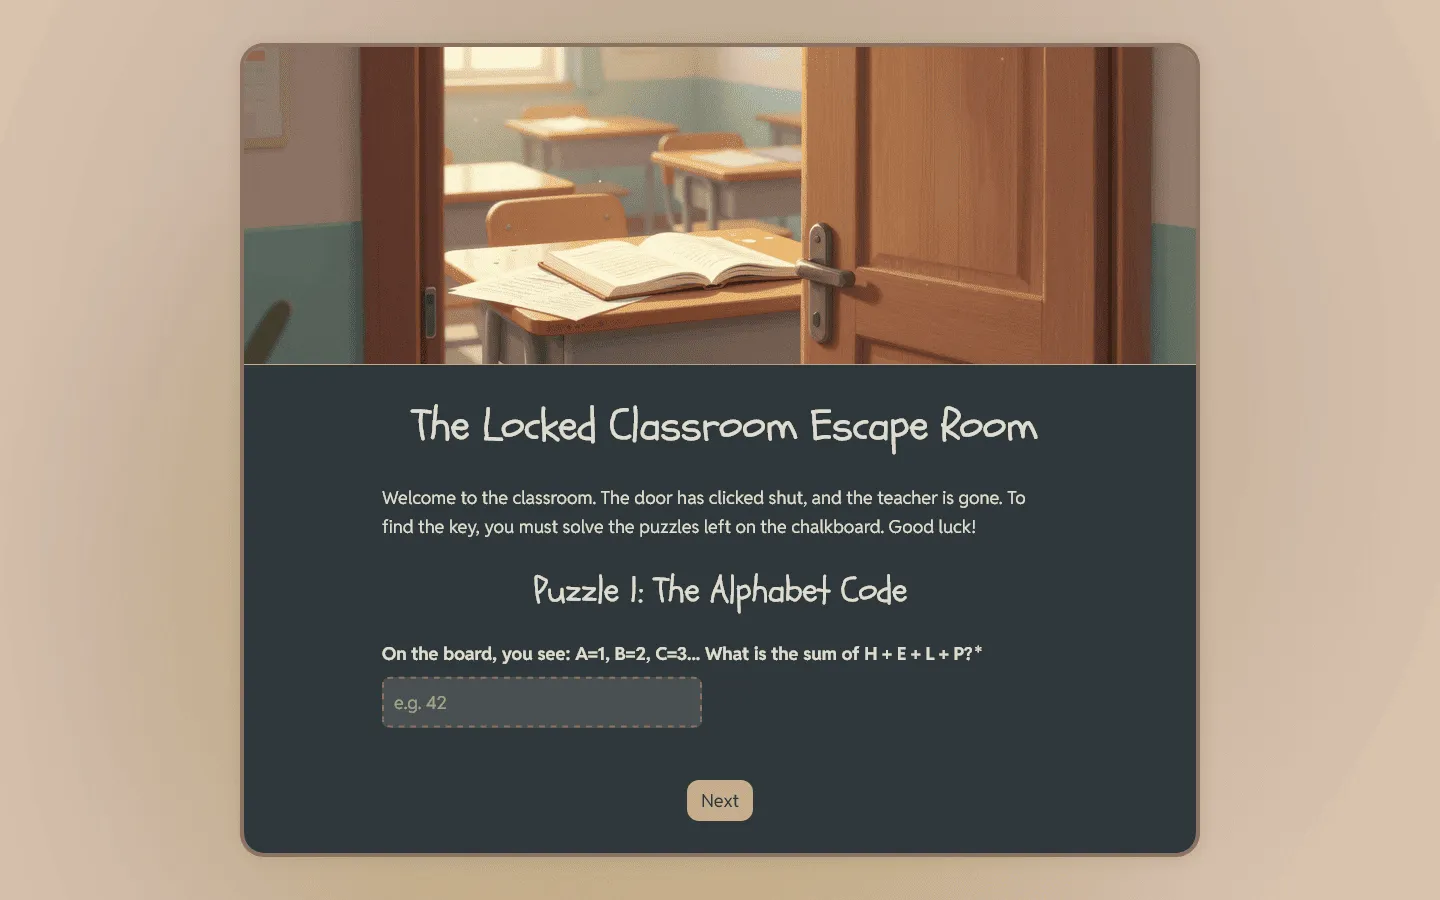
It gives you much more control over the look and feel of your forms. You can use custom layouts, add richer media, and design pages that actually fit the theme of your story. The logic features are also more robust, making it easier to manage branching paths without getting lost in your own settings.
You can generate a fully custom escape room from a short description (for example: “A school-themed escape room form featuring three interactive puzzles with a real-time scoring system and a warm chalkboard-inspired design”) and edit it to fit your needs.
It’s free and doesn’t require an account to set up.
Frequently asked questions
Can you make a digital escape room for students with Google Forms?
Yes. Google Forms is a common way to build simple digital escape rooms for students because it is free and easy to share. The usual setup is one section per puzzle, with response validation used to block progress until the right answer is entered.
Can I set a time limit on a Google Forms escape room?
Google Forms does not have a built-in timer feature. If you want to time participants, they will need to use their own stopwatch, or you will need to use a third-party add-on, for example, this one.
How do I stop participants from skipping puzzles?
You must make sure every puzzle question is marked as Required and has Response validation turned on. This combination forces participants to type the correct answer before the “Next” button will let them proceed to the next section.
Can I use images as answers in a Google Forms escape room?
You can add images to multiple choice options, but you cannot use response validation on multiple choice questions in the same way you do for short text answers. For multiple choice image questions, you will need to use the “Go to section based on answer” feature to send incorrect guesses to a “Try Again” section.
What happens if someone types the right answer but with capital letters?
If your response validation uses the “Text Contains” rule, it is usually safer. However, if you use “Text Exactly”, it will be case-sensitive. It is good practice to add a note to your question telling participants whether to use all lowercase or all caps.